Cutting a fringe is normally the attribute of the hairdresser. Expert in the field, he will know how to make the prettiest fringes, those that will sublimate you. To maximize your chances of having a cut adapted to the shape of your face, choose a hairstylist who will advise you best on the fringe to adopt.
Having a fringe has many advantages: it gives style, dresses the face and camouflages small imperfections. But choosing this hairstyle also means accepting a significant constraint: going to the hairdresser every 3 weeks or so to maintain it.
However, sometimes it is impossible to go to a professional. How to keep your bangs in this case? It is clear that you will have to be your own hairdresser. Yes, it is possible! By following the advice of Christophe Adric, hairdresser and artistic director of Maison Artley, in Paris, you will see that cutting your bangs is (almost) child's play.
Cut your bangs yourself: the steps
Step 1: have the right accessories to cut bangs
First of all, you have to be well equipped. Choose scissors that cut well. The ideal is to choose those used by hairdressers, such as Takaï scissors, a good long-term investment if you decide never to go to the hairdresser again. Otherwise, make do with kitchen scissors that you have washed well beforehand.
As for the comb, Christophe Adric recommends choosing one made of carbon fiber, thin and light, with teeth that are neither too wide nor too thin, all for greater precision.
Video of the day:Also bring two clips, or an elastic when the hair is very long, to separate what is going to be cut from the rest.
Step 2: define the work area to cut your bangs properly
After detangling your hair, Christophe Adric recommends moistening the fringe to make the job easier. Some hairdressers advise to cut on dry hair, “but it does not forgive if you are wrong, warns our expert. Slightly wetting your hair allows you to be more precise and to achieve the fringe in one stroke”.
This avoids making too many mistakes, because the more you touch up, the more you risk ending up with failed bangs.
Then, you will have to delimit the work area. If you already have bangs, all you have to do is take the section of hair you want to shorten between your fingers. On the other hand, if you do not yet have bangs, you will have to determine the thickness of it yourself.
For this, you have to take into account your hair type. If they are curly or thick, start the fringe fairly close to the hairline. Count 3 or 4 cm, no more. Otherwise it will be too massive.
What mask according to my hair type?Conversely, if you have fine hair, the fringe can start at 5 cm at the top of the skull, to give it substance. Then, with the comb, draw a semi-circle or a triangle to define the base of the bangs.
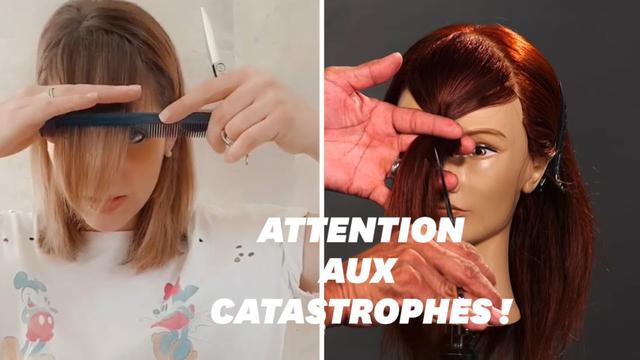
Step 3: cut your bangs
After defining the thickness, you have to choose the length you want to give to your bangs. In general, we take the hollow of the nose as the basic reference. It is better to make it longer because it will always be possible to cut a little shorter afterwards.
For the width, we take the two eyes as a reference. Be careful not to cut hair after the hollow of the temples, otherwise the fringe will not blend with the rest of the hair.
Then move on to the preparation of the gesture. "50% of the work is done at that time," says Christophe Adric. Place your hair well, coordinate well and the scissor cut will be easier. You won't have to do it twice."
Take the bangs in your fingers and style the part of the hair to be cut, with the comb horizontal. Facing the mirror, head straight, place your scissors horizontally or slightly curved downwards. Christophe Adric advises you not to tilt them upwards so as not to thin the hair.
25 ideas for tapered bobsNow the question is how to cut according to the type of bangs?
- Short straight bangs: cut straight at eyebrow level.
- Straight, long bangs: take the tip of the nose as a guide. Twist the fringe and cut everything well in the axis.
- Asymmetrical bangs: twist the strand and direct it in front of the eye where the short part will be. If you want a right-swept strand (so shorter on the left), trim below the left eye. And vice versa. Be sure to cut straight.
Step 4: the finishing touches for a beautiful fringe
“Finishes are all the little details you notice when the hair is dry,” explains the hairdresser.
Among the finishes that can be made, there is staking: just hold the scissors vertically, slightly inclined and cut in a sawtooth pattern. This allows you to remove a tiny bit of material to refine the fringe and make it more natural and light.
3 tips for thinning curly hairYou can also slightly trim the locks that are not adjusted.
Mistakes not to make to cut the bangs properly
If there is one thing you can do wrong in hairdressing, it's the bangs. And a failed fringe is difficult to hide!
So, to avoid the beauty faux pas, here are the mistakes to avoid.
Already, you have to have time in front of you. At least 10 to 15 minutes. Out of the question to cut your bangs before going to work, before a job interview or even before taking the plane!
Other mistakes to avoid: working without a mirror and sitting down. To cut your bangs properly, you have to be standing up straight, facing a mirror, in peace, with no one around. And think about the fact that the mirror inverts everything! So be careful especially if you want an asymmetrical fringe.
Of course, we do not choose scissors that do not cut, at the risk of having to change pairs along the way.
Another error and not the least: cutting your hair without taking into account its daily appearance. Explanations: for example, if you have very curly hair and you straighten it every day, you should not cut it as "curly hair" but as straight hair. Otherwise, the length or shape will not necessarily be suitable.
>>> Many thanks to Christophe Adric for his advice. Find him at Maison Artley, 12 rue Béranger, 75003 Paris.

